StoriBot works best when the whole team is in it — the people who draft, the people who review, and the people who send. Adding a teammate takes a couple of minutes. Here's the whole flow, one screen at a time.
Home page
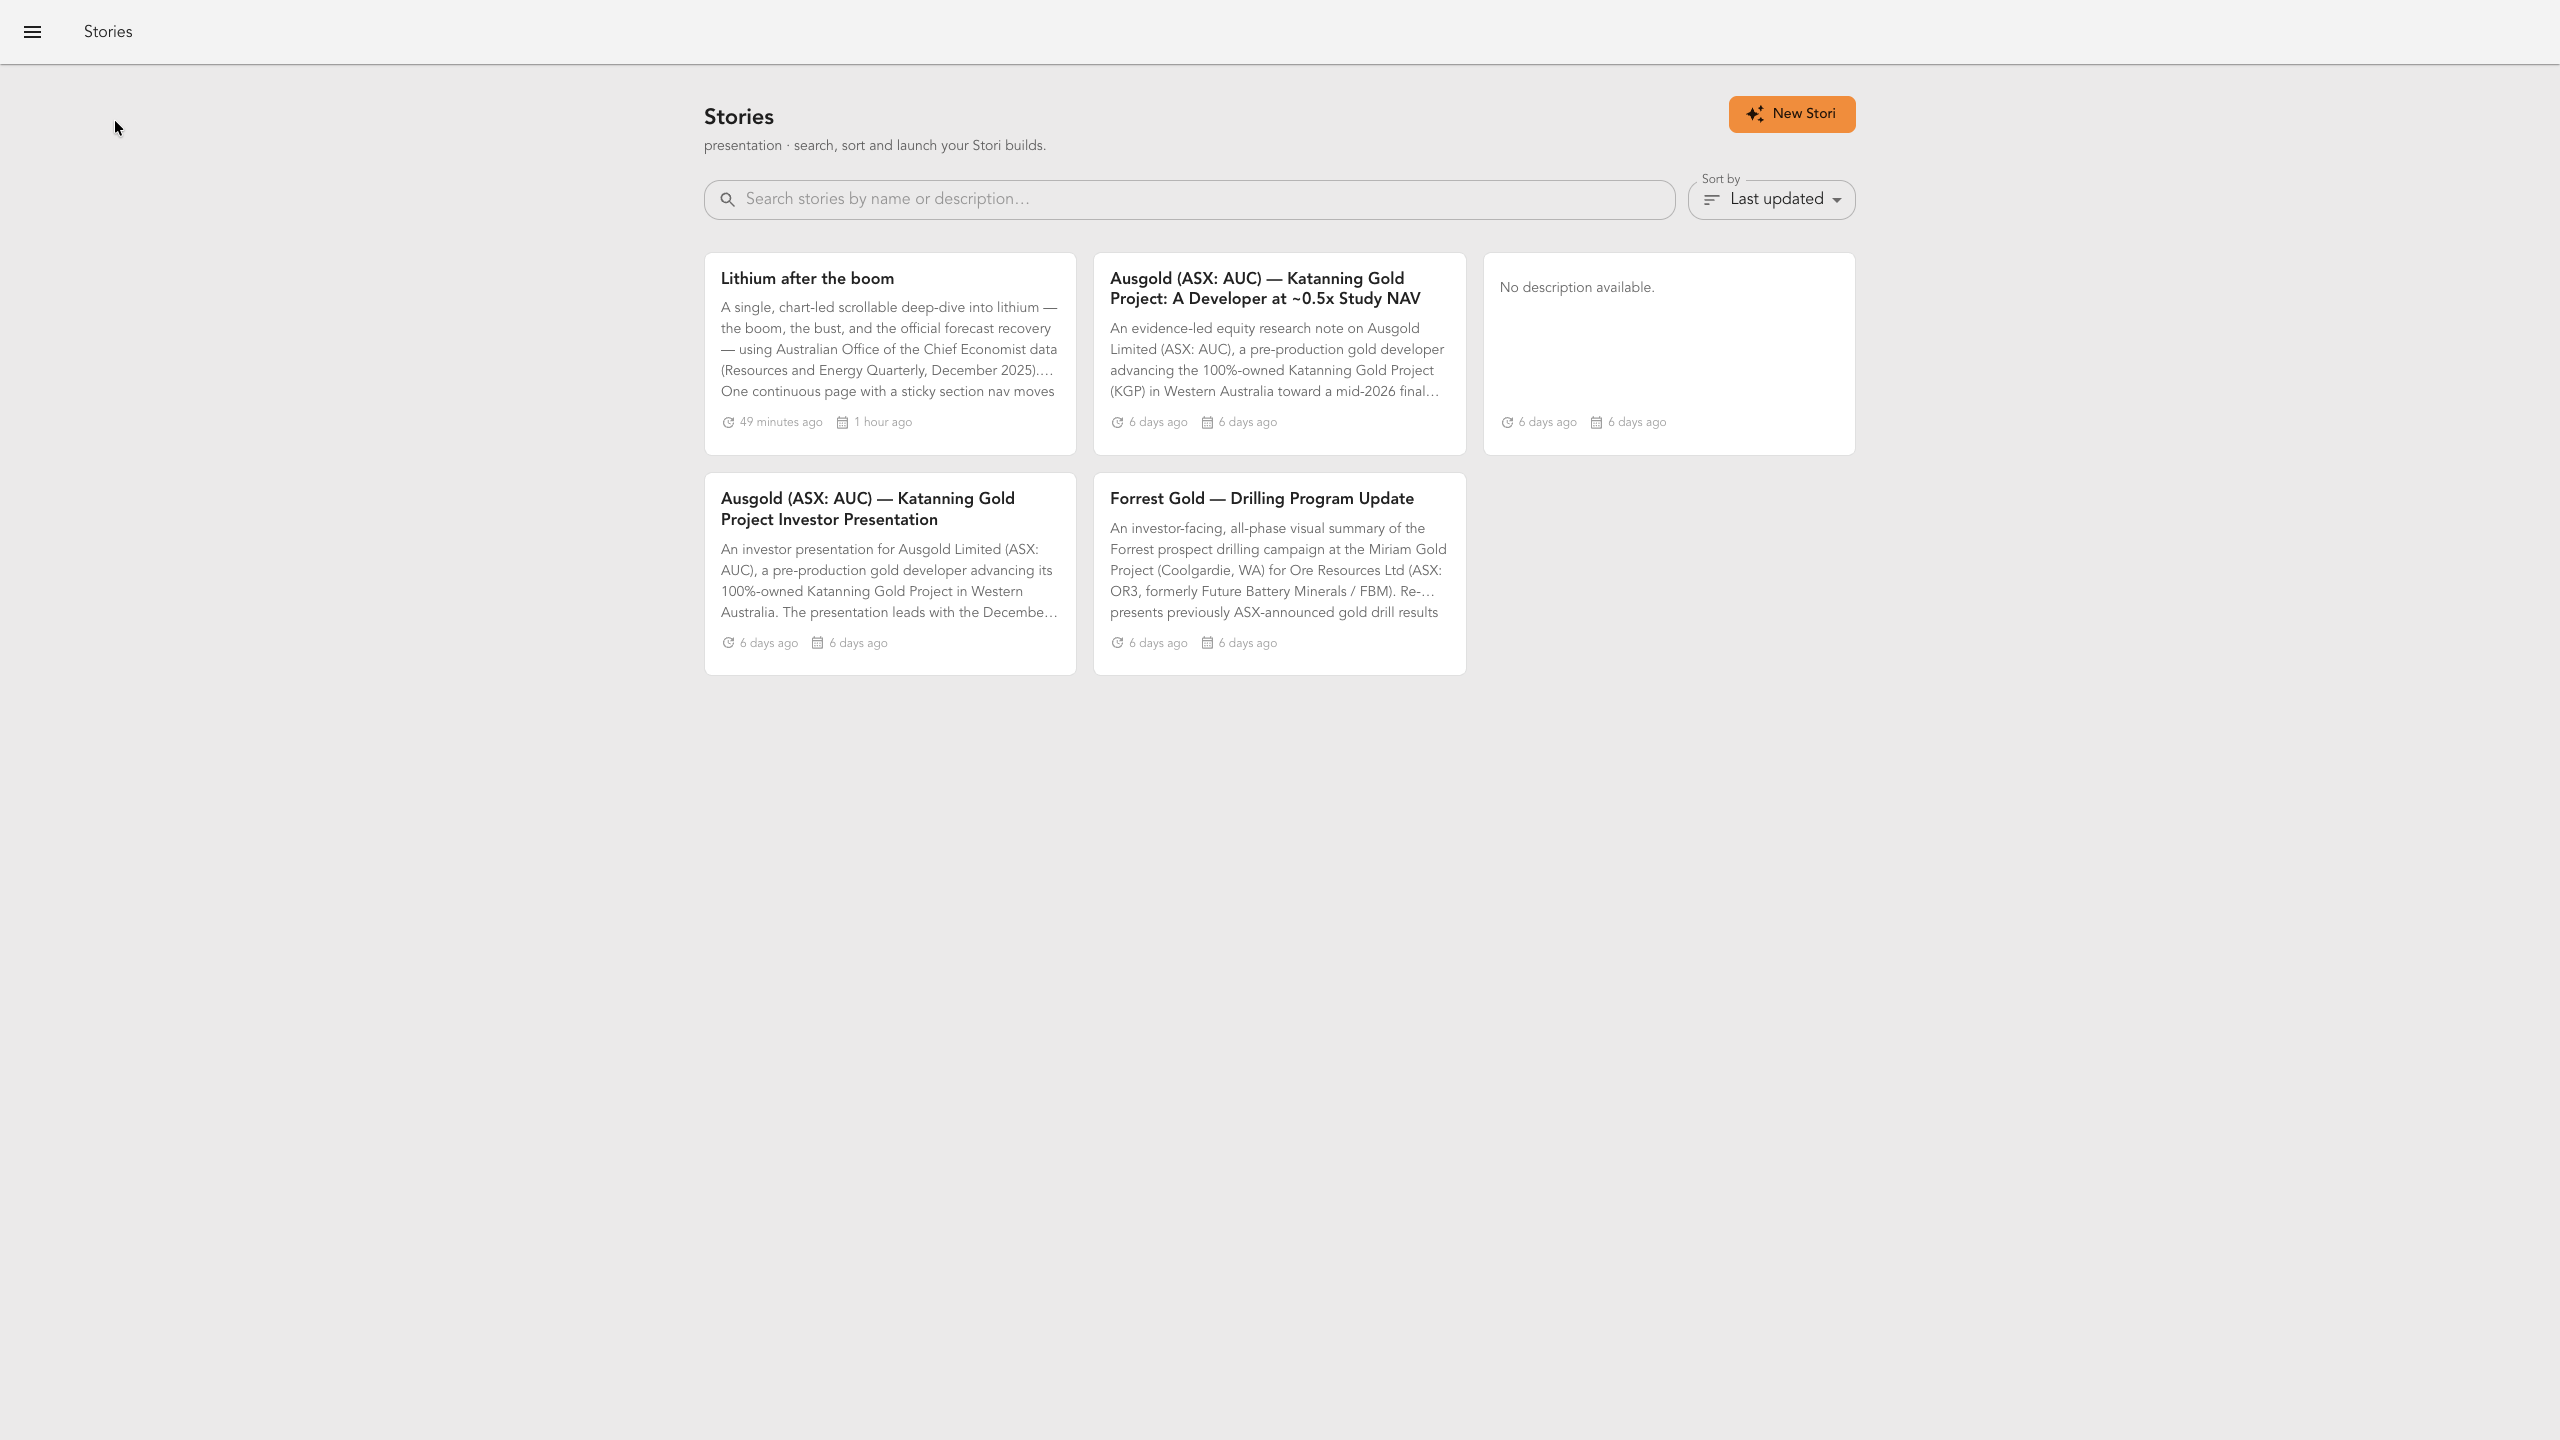
This is your StoriBot home page. To invite new users, open the hamburger menu in the top-left corner.
Open Team
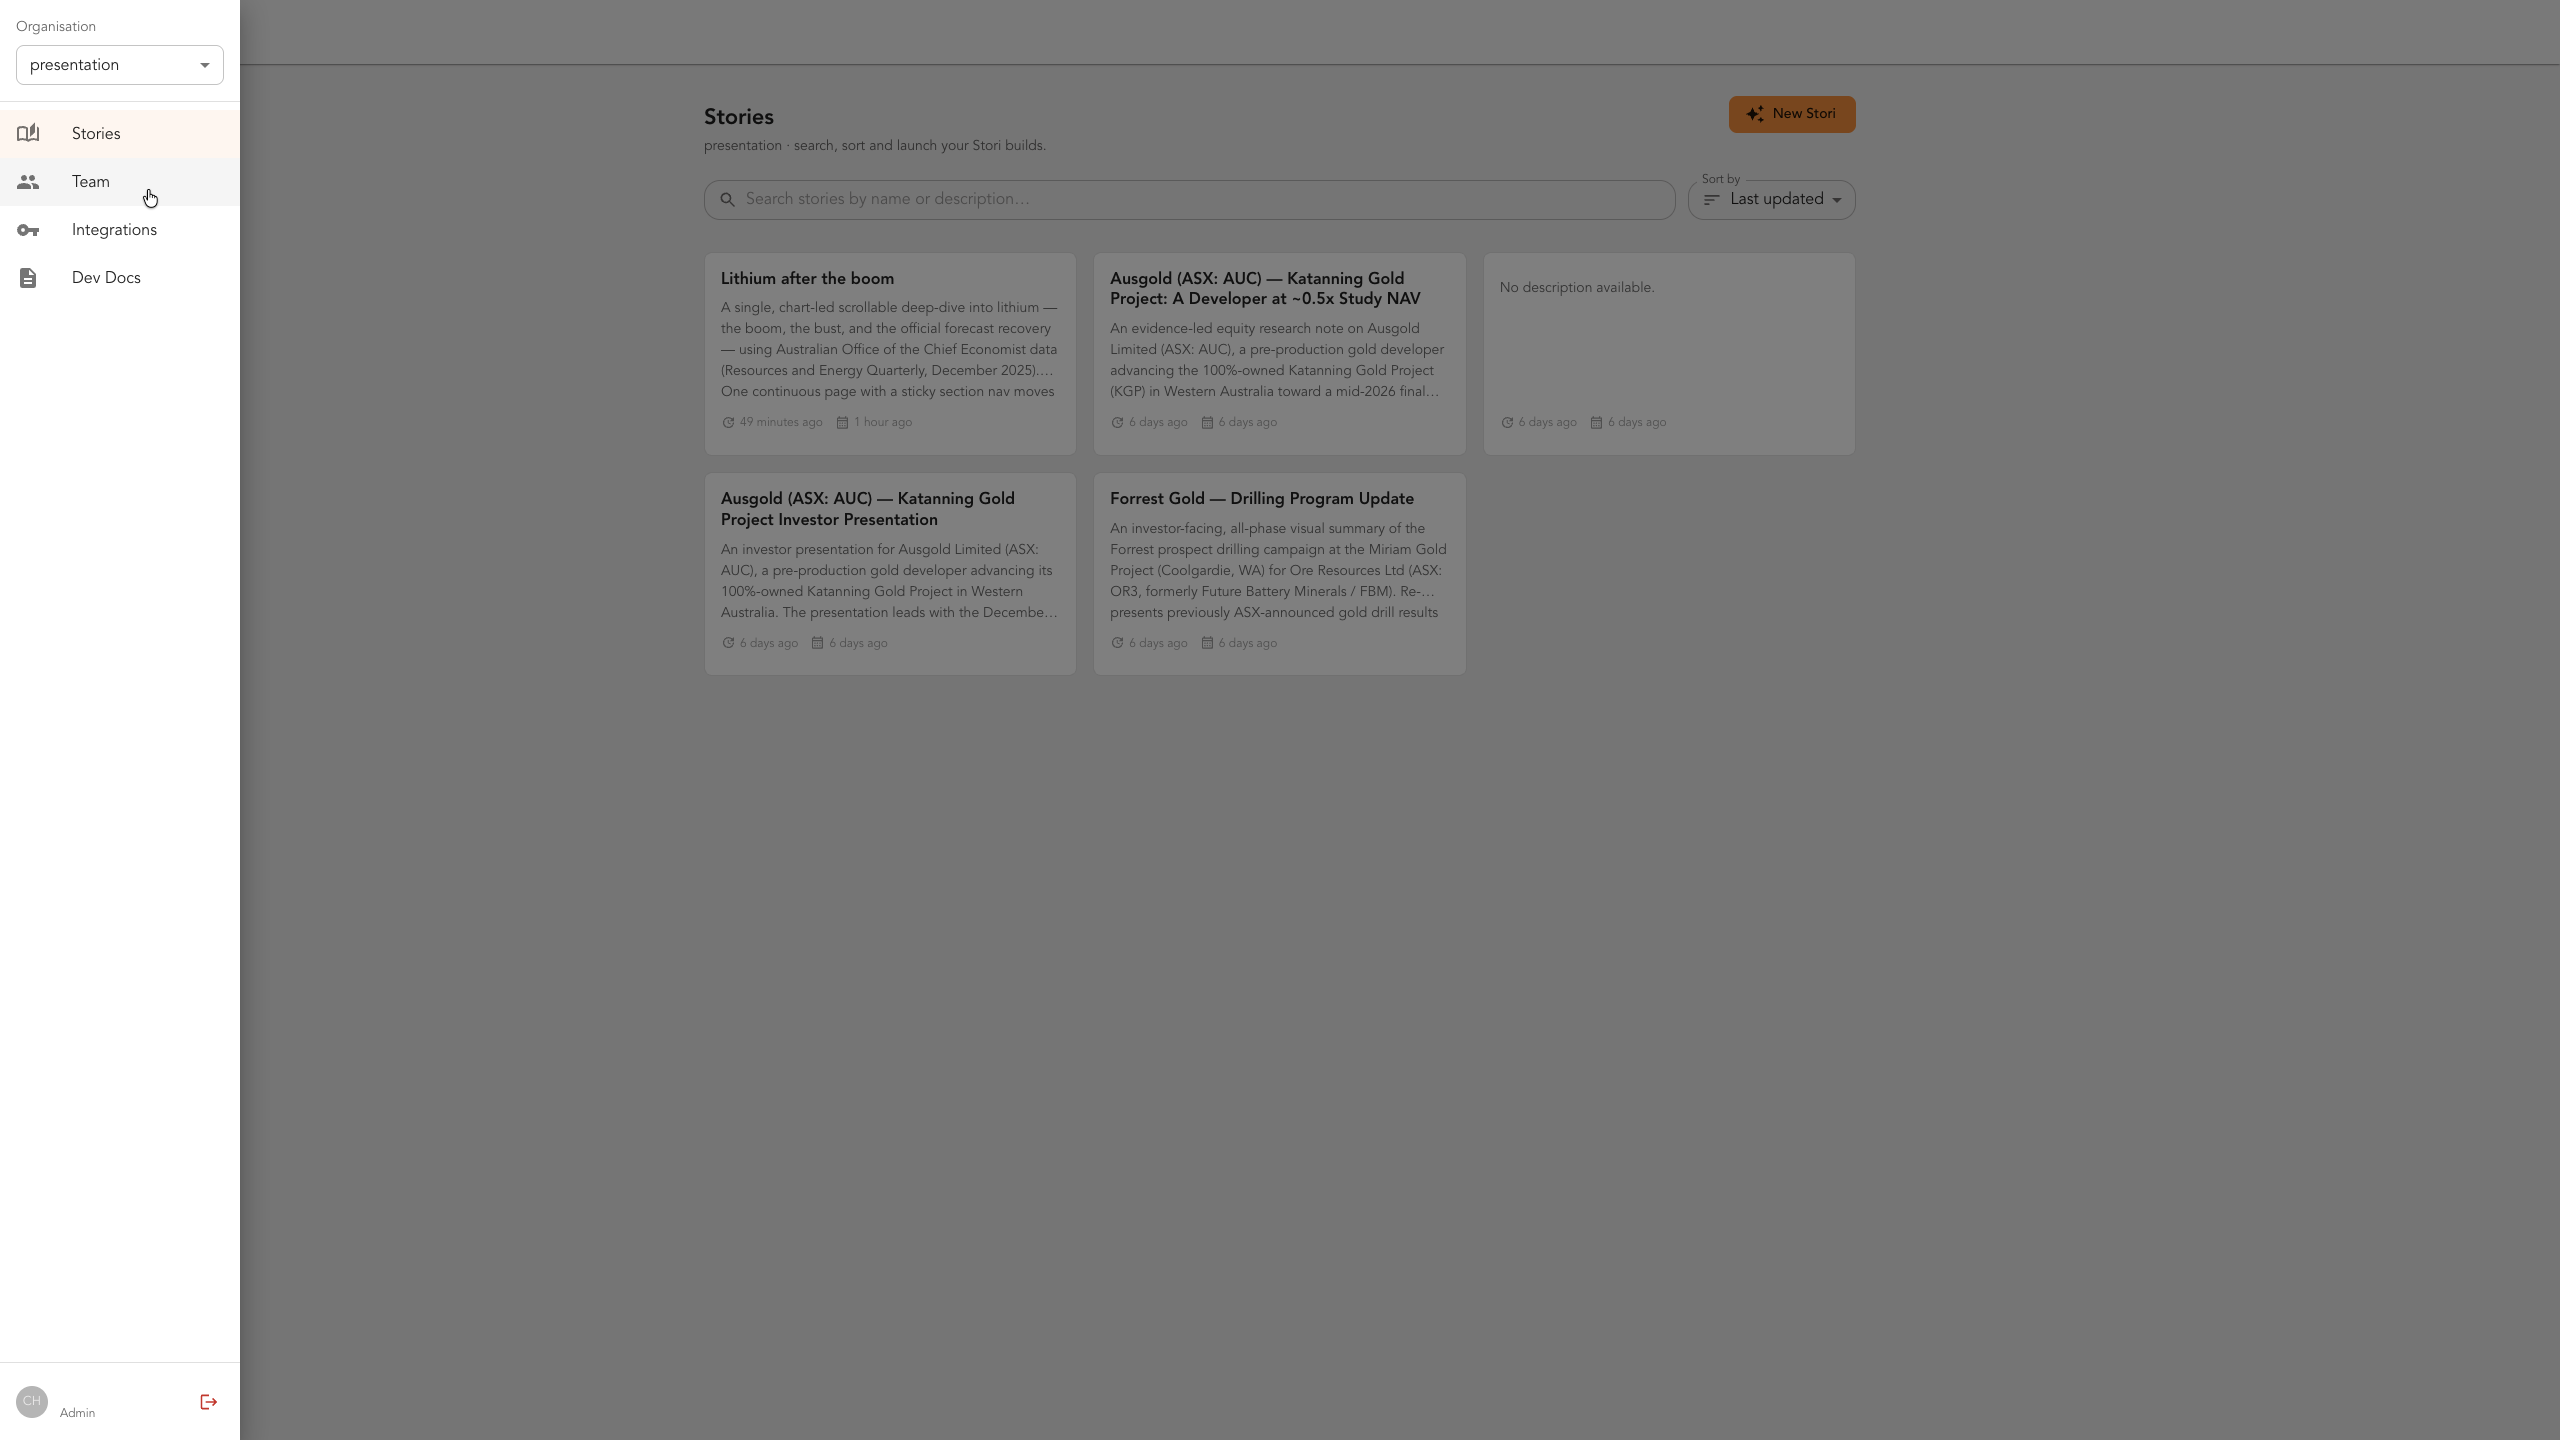
In the sidebar, click Team.
Members management
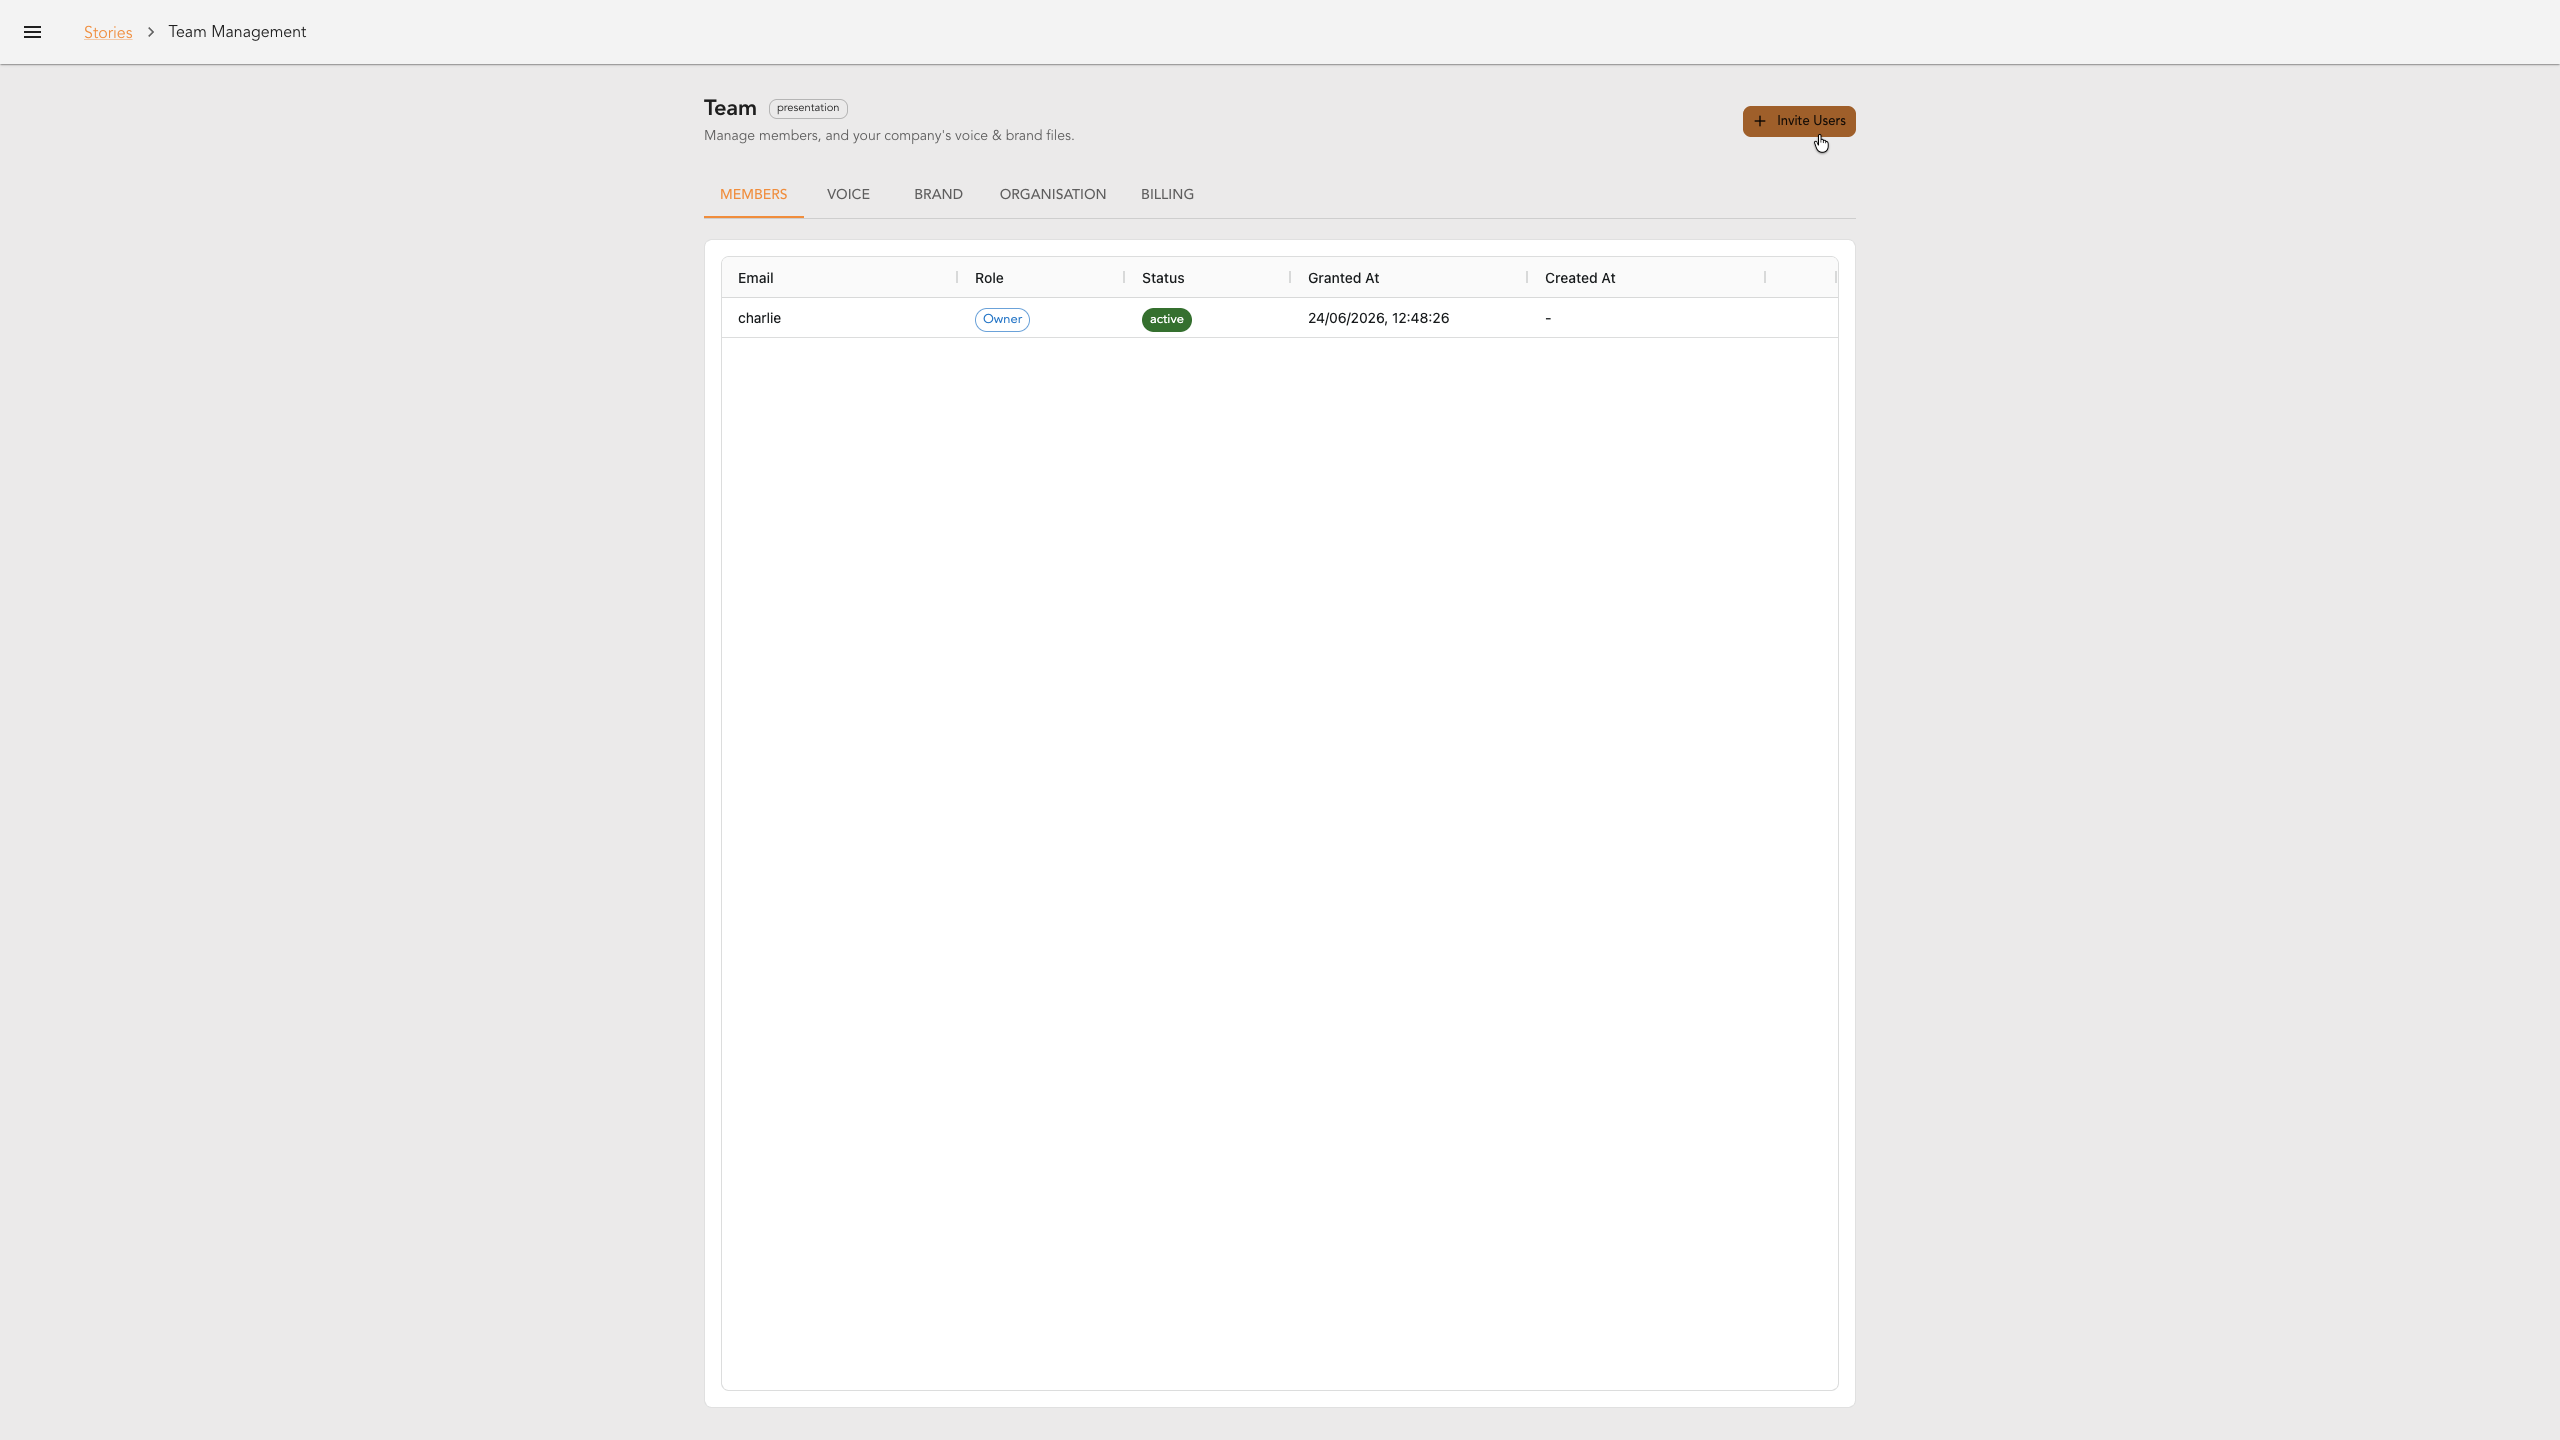
This is the members screen — everyone in your organisation, their role and their status. To add someone new, click Invite Users in the top right.
Send the invite
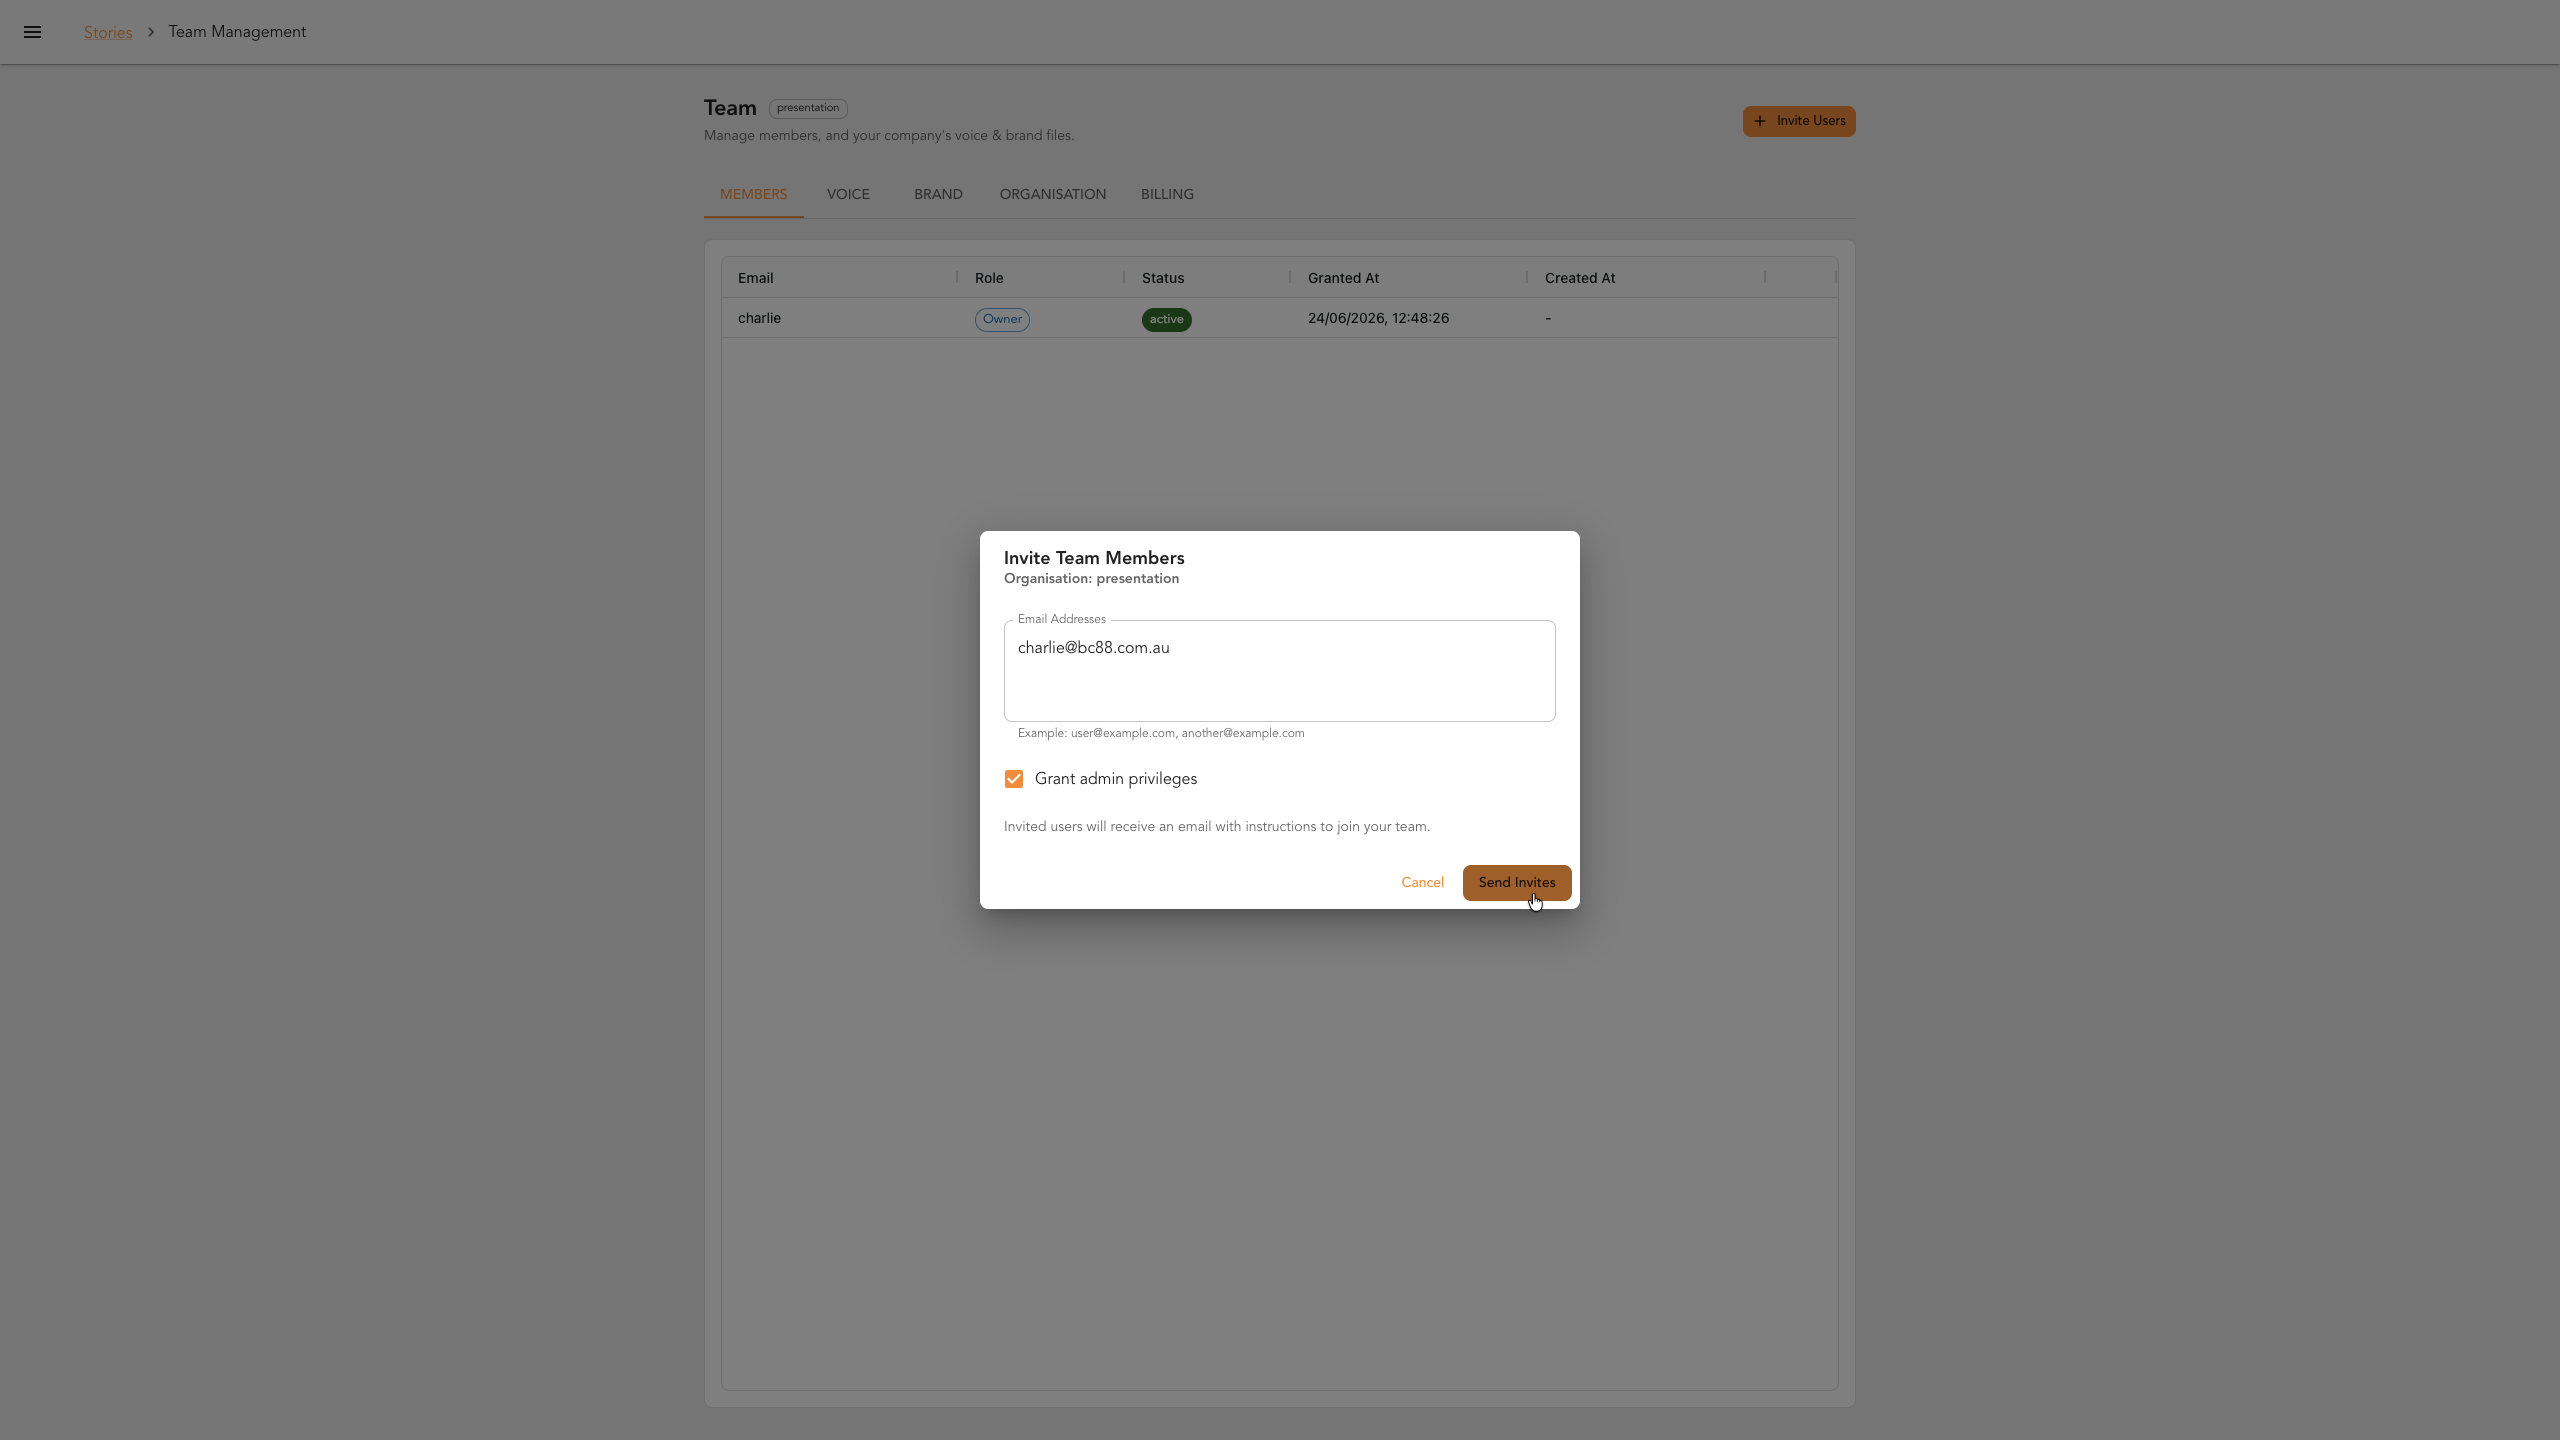
Enter their email address and click Send Invites — an email lands in their inbox with instructions to join. Tick Grant admin privileges only for people you trust to invite users themselves and change your brand and voice guidelines.
Track the invite
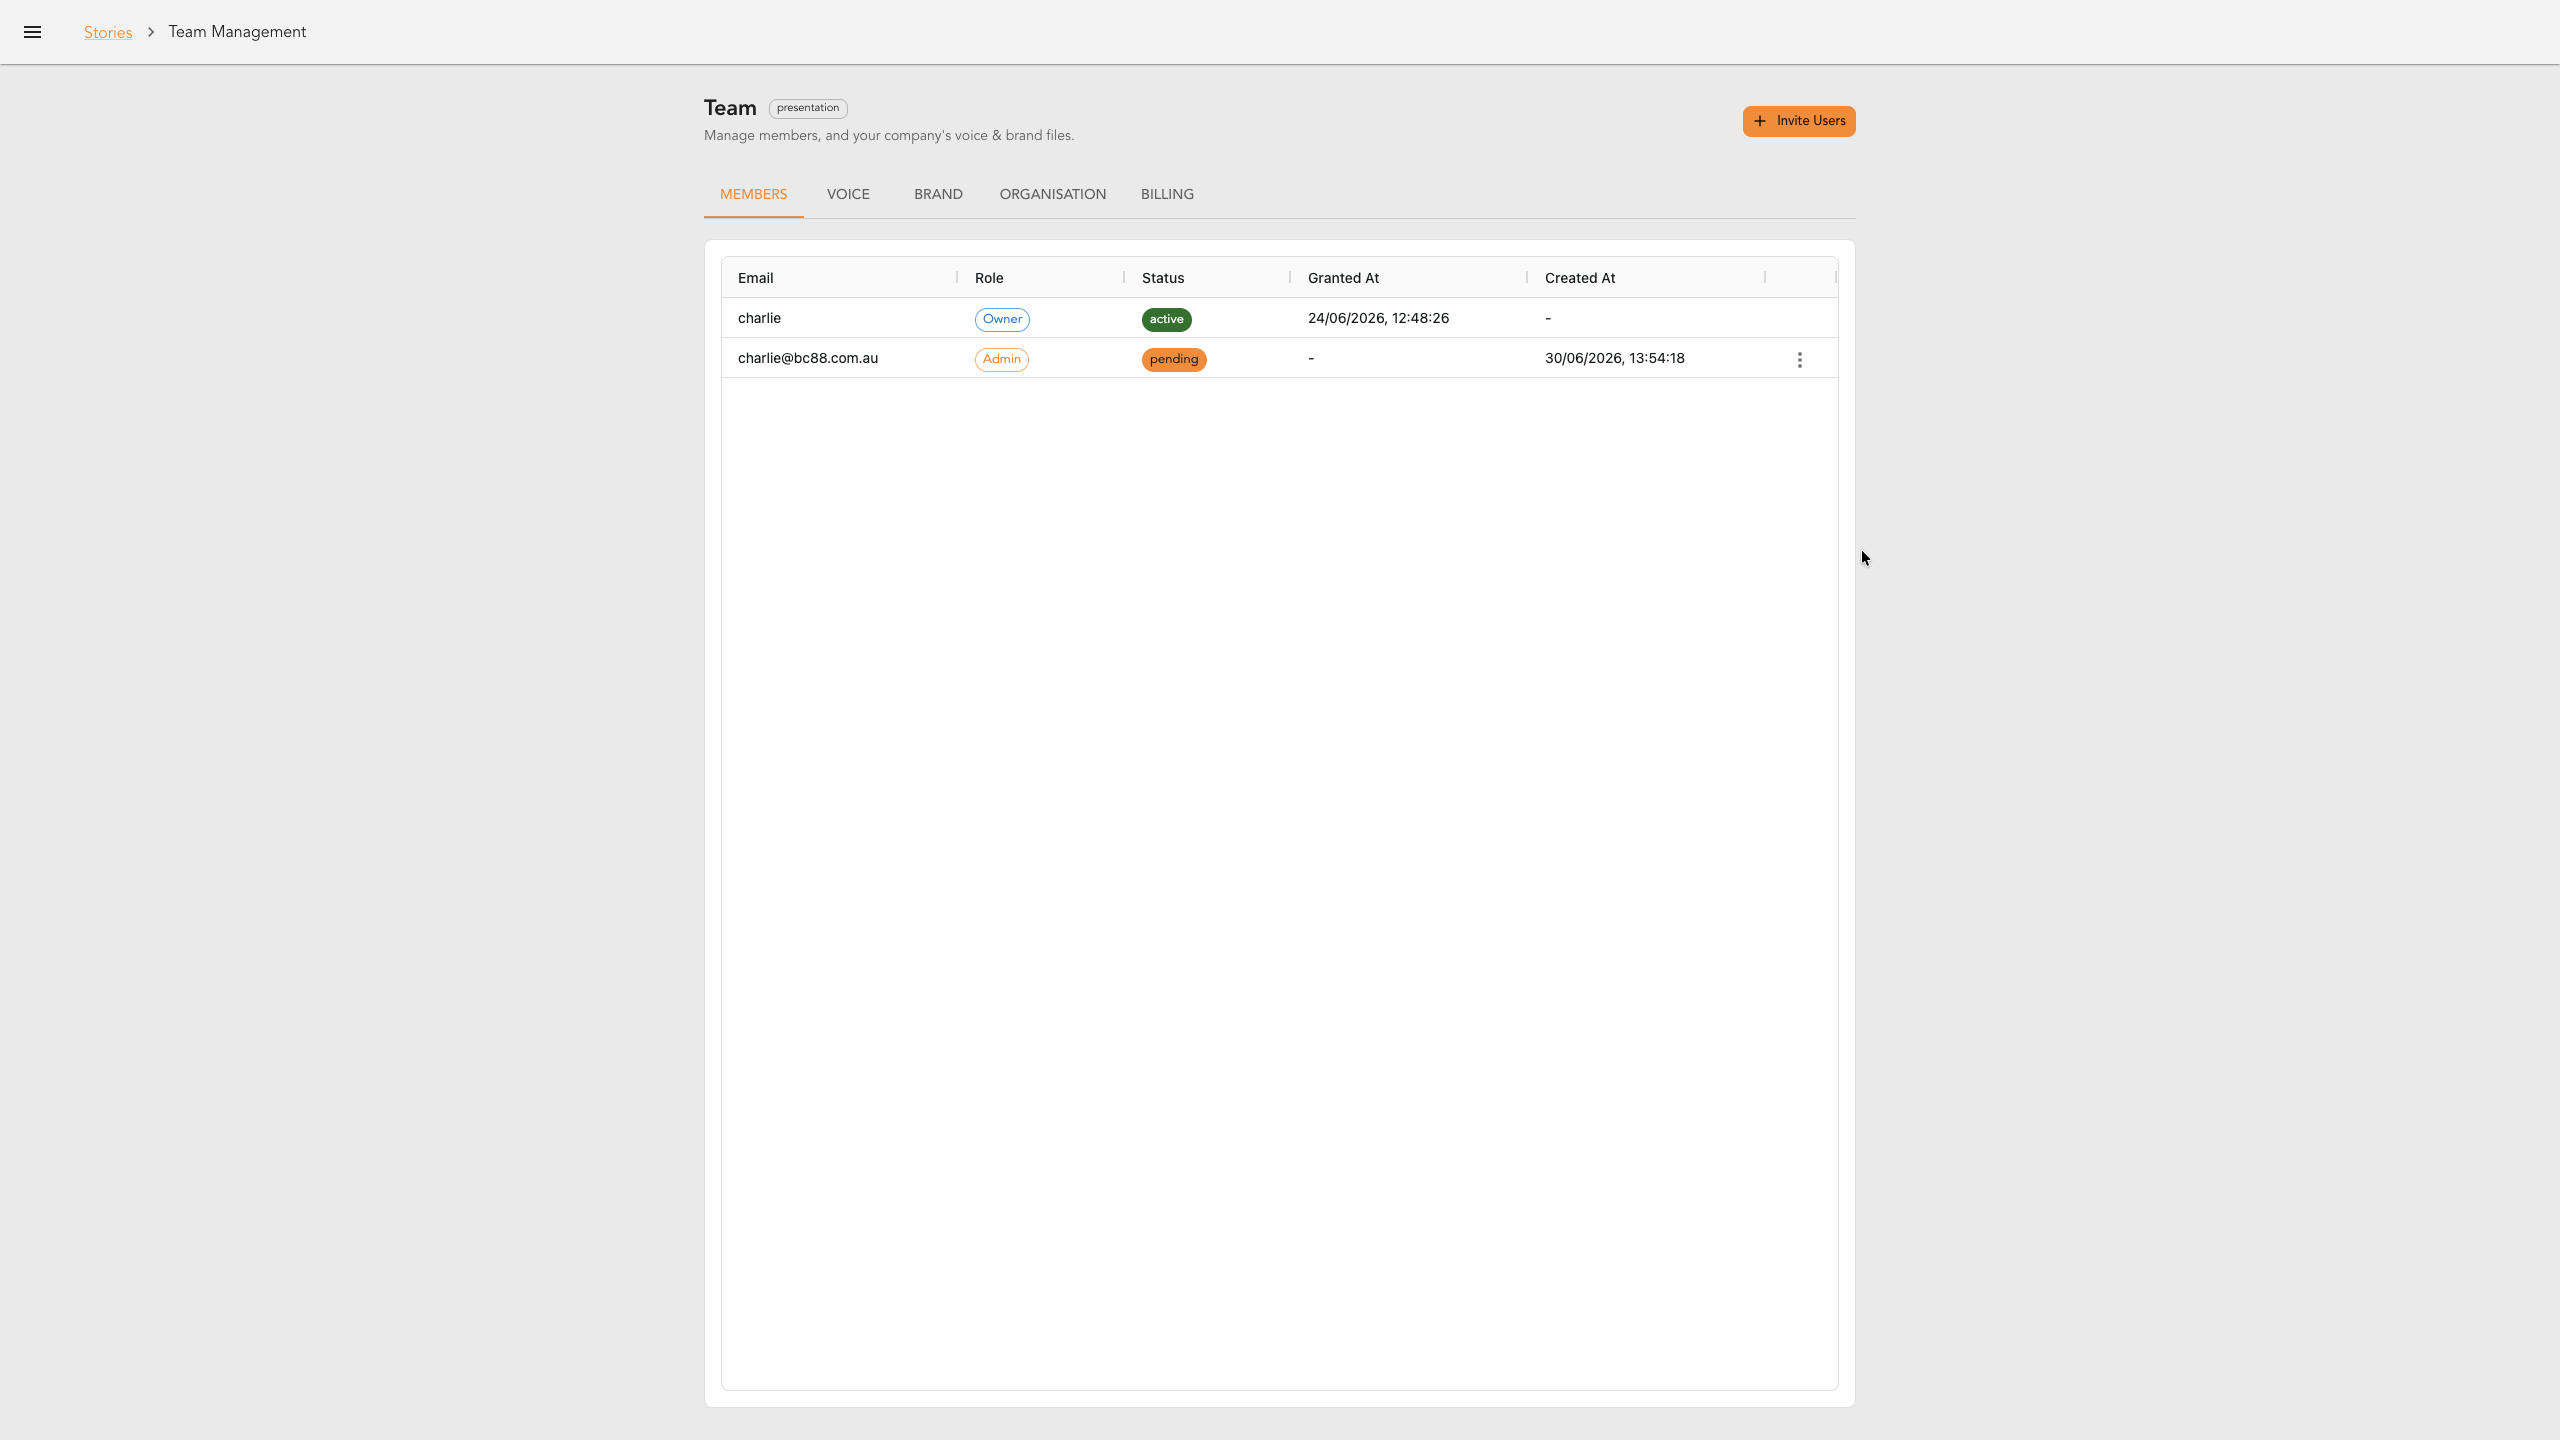
The new member shows as pending until they accept the invite. One thing to note: each organisation has its own members. If someone needs access to more than one of your organisations, switch organisation and repeat steps 3–4 in each.
Your turn
That's it — your team is in, with the right people holding admin rights. Invite yours at app.stori.bot.